Best Delivery Birthday Wishes

Today’s card uses the Best Delivery Stamp Set to send Birthday Wishes to a loved one.
The truck is so fun – should we guess what’s inside it?

Best Delivery Stamp Set, Pattern Party Designer Paper, Subtles 6" x 6" Designer Paper, Stamp with Peggy


I cased the truck from the Spring Mini Catalog – page 53.
First I stamped the truck on Basic White, then I stamped it a second time on a piece
of Pattern Party Designer Paper (this is a Host Exclusive item).  The Designer Paper is big enough
for the body of the truck — we don’t need the cab portion.
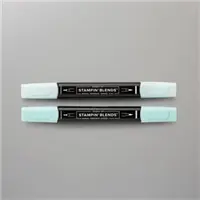
Next I used Pool Party Stampin’ Blends to color both the front of the truck and the Designer Paper.
Fussy cut the body of the truck from the Designer Paper — cut around the tires.
Then adhere the Designer Paper to the stamped truck — look how great it looks!!!

The greeting is Basic White cut using the Hippo & Friends Dies.
Stamp the greeting with Memento ink and then stamp the balloons three times with
Coastal Cabana ink stamped off.

I love the Black & White Checked Designer Paper behind the truck layers.
It makes it all “pop”!

Here is the SUPPLY LIST for this project.
Click on any of the products to go right to my
Stampin’ Up! store:
I APPRECIATE YOU TAKING THE TIME TO VISIT MY BLOG.
YOUR COMMENTS AND ORDERS ARE ALWAYS APPRECIATED!

Receive a 5-card project tutorial from me when you place an order of $35 or more
during the month of January.
This tutorial set will not be featured on my blog — it’s an ordering exclusive from me as a Thank You Gift
(Club orders do not qualify). Please use the host code below when placing your order.

CURRENT HOST CODE


Host Code, Stamp with Peggy


Use this host code to place your online order with me.
If your order is over $150 DO NOT use the code,
you’ll get your own Stampin’ Rewards from Stampin’ Up!
Just copy and paste this code 74SEEDDQ when placing your order.

FOLLOW ME….

Facebook: https://www.facebook.com/StampWithPeggy/
Pinterest: https://www.pinterest.com/peggymurwin/
YouTube:  https://www.youtube.com/channel/UCzWMDTQVYAhveWgCr5g6FkQ

Share this!

Valentine Fun with Gnomes

Last night’s Facebook Live was Valentine Fun with Gnomes!!
I shared a fabulous Valentine Home Decor piece and a cute little treat holder.

Special Moment Stamp Set, Pine Tree Punch, Cactus Builder Punch, Ladybug Builder Punch Sweet Talk Designer Paper, Stripes & Splatters 3D Embossing Folder, Valentine's Day, Treat Holder, Home Decor, Stamp with Peggy


We started this week’s Facebook Live with a quick and easy treat holder.
I’ve made these fun matchbooks to hold a snack size M & M for years but this
one with the little Valentine gnome is an all-time favorite.

Special Moment Stamp Set, Pine Tree Punch, Cactus Builder Punch, Ladybug Builder Punch Sweet Talk Designer Paper, Stripes & Splatters 3D Embossing Folder, Valentine's Day, Treat Holder, Home Decor, Stamp with Peggy
I love making home decor pieces and Dollar Tree is a great source of base pieces to work with.
Some wooden arrows at our local Dollar Tree and I was off to make a fun Valentine piece to hang on the wall.
A little cardstock and designer paper gave me a pretty palette to work with.


Pine Tree Punch, Cactus Builder Punch, Ladybug Builder Punch Sweet Talk Designer Paper, Stripes & Splatters 3D Embossing Folder, Valentine's Day, Treat Holder, Home Decor, Stamp with Peggy
I couldn’t get enough of the gnomes — I added two to our sign.

The “X” and “O” were cut using retired Large Letters Dies.
Embossing the Real Red triangle for the point of the arrow with the Stripes 3D Embossing Folder
gave our sign a fine texture with a Stitched Heart to finish it off.

I used a few punches to create the gnome:
Beautiful Tree Die for the beard
Pine Tree Punch for the hat
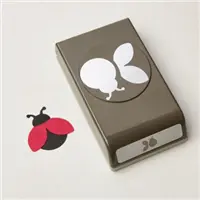
Ladybug Building Punch for the feet
Cactus Builder Punch for his nose


Pine Tree Punch, Cactus Builder Punch, Ladybug Builder Punch Sweet Talk Designer Paper, Stripes & Splatters 3D Embossing Folder, Valentine's Day, Treat Holder, Home Decor, Stamp with Peggy


Click Here to View Video


Want a kit to make these two projects at home?
I’ll send you a kit FREE with a $40 order placed by Saturday, January 29th.
Use Host Code 74SEEDDQ when placing your order.


Here is the SUPPLY LIST for this project.
Click on any of the products to go right to my
Stampin’ Up! store:
I APPRECIATE YOU TAKING THE TIME TO VISIT MY BLOG.
YOUR COMMENTS AND ORDERS ARE ALWAYS APPRECIATED!

Receive a 5-card project tutorial from me when you place an order of $35 or more
during the month of January.
This tutorial set will not be featured on my blog — it’s an ordering exclusive from me as a Thank You Gift
(Club orders do not qualify). Please use the host code below when placing your order.

CURRENT HOST CODE


Host Code, Stamp with Peggy


Use this host code to place your online order with me.
If your order is over $150 DO NOT use the code,
you’ll get your own Stampin’ Rewards from Stampin’ Up!
Just copy and paste this code 74SEEDDQ when placing your order.

FOLLOW ME….

Facebook: https://www.facebook.com/StampWithPeggy/
Pinterest: https://www.pinterest.com/peggymurwin/
YouTube:  https://www.youtube.com/channel/UCzWMDTQVYAhveWgCr5g6FkQ

Share this!

Daffodil Afternoon Happy Birthday

It’s a Daffodil Afternoon Happy Birthday.
Today’s card is SUPER Simple but elegant.
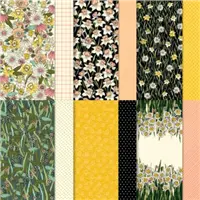
The Daffodil Afternoon Designer Paper does all the work.
This paper is one of your FREE Sale-a-Bration choices when you place a $50 order.

Slim Sayings Stamp Set, Daffodil Afternoon Designer Paper, Brushed Brass Butterflies, Birthday, Sale-a-Bration, Stamp with Peggy


The flowers in the Designer Paper look so real, don’t they?
I layered the Designer Paper pieces on Very Vanilla.
Happy Birthday is stamped on Very Vanilla with Mossy Meadow ink – adhered to Mossy Meadow cardstock.
These layers are attached to designer paper layer with Dimensionals and the ends are trimmed even with
Very Vanilla edges.  Then it is all adhered to the Mossy Meadow card base.
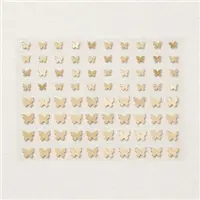
Add some Brushed Brass Butterflies and you are all done.
Super Quick and Easy!!!

Here is the SUPPLY LIST for this project.
Click on any of the products to go right to my
Stampin’ Up! store:
I APPRECIATE YOU TAKING THE TIME TO VISIT MY BLOG.
YOUR COMMENTS AND ORDERS ARE ALWAYS APPRECIATED!

Receive a 5-card project tutorial from me when you place an order of $35 or more
during the month of January.
This tutorial set will not be featured on my blog — it’s an ordering exclusive from me as a Thank You Gift
(Club orders do not qualify). Please use the host code below when placing your order.

CURRENT HOST CODE


Host Code, Stamp with Peggy


Use this host code to place your online order with me.
If your order is over $150 DO NOT use the code,
you’ll get your own Stampin’ Rewards from Stampin’ Up!
Just copy and paste this code 74SEEDDQ when placing your order.

FOLLOW ME….

Facebook: https://www.facebook.com/StampWithPeggy/
Pinterest: https://www.pinterest.com/peggymurwin/
YouTube:  https://www.youtube.com/channel/UCzWMDTQVYAhveWgCr5g6FkQ

Share this!