
Woot, Woot — It’s NEW Catalog time!!!
We can start placing orders NOW.
Many of you picked up catalogs Tuesday night.
How are you liking them?
So many fun new products.
If you didn’t get a catalog yet,
contact me right away so you can get one too.
Two fabulous specials just announced!!!
Join my “StampBee” Team — choose 2 FREE Stamp sets in your Starter Kit!!
That’s right — from June 1st – June 30th — when you purchase the
Stampin’ Up! starter kit you get to choose 2 FREE stamp sets.
This is in addition to the $125 of wonderful products you get
to choose in your starter kit and you pay only $99
AND YOU GET FREE SHIPPING on your starter kit.
Then you can start enjoying the 20-25% demonstrator discount
on all your orders. You’ll also enjoy the friendships
and creativity of your fellow StampBees Team members.
Second Deal:
Host a book party, a stampin’ party or a class with your friends between June 1st and June 30th and receive an EXTRA $35 in hostess benefits
When your order is $350 or more in June, enjoy an extra $35 in Stampin’ Rewards.
That’s in addition to the regular Stampin’ Rewards.
Spend your Stampin’ Rewards on hostess sets or on anything in the catalog
or you can even apply it to the starter kit!
Gather orders from your friends (I can help you with a hostess code for everyone to order online),
or place your own shopping spree order to enjoy the extra rewards!
Remember.. ALL orders of $150 or more enjoy the Stampin’ Rewards (Hostess $$) to spend any way you wish!
So back to the new catalog and the amazing things in it… There are so many fabulous stamp sets, designer papers, punches, dies, and embellishments!
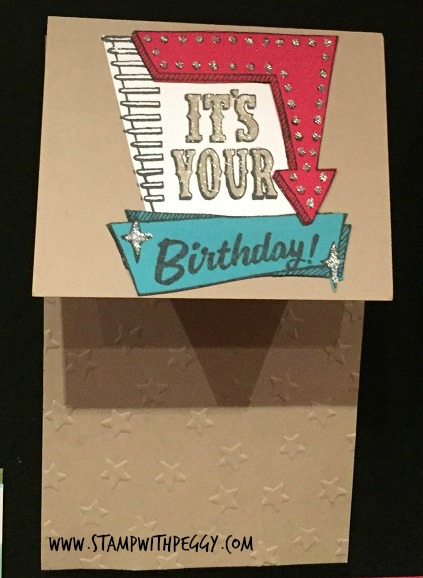
Check out this cute card I saw while on the cruise.
It uses the new stamp set called Marquee Messages.
I love this stamp set.

The card base is Crumb Cake that has been
embossed with the Lucky Stars embossing folder.
The Marquee sign stamp is stamped three times
(once on Whisper White, once on Real Red and
one more time on Bermuda Bay cardstock)
with Memento ink and cut out with Paper Snips.
Reassemble the pieces and attach to card front.
Imagine all the color possibilities.
