Fun with Painted Christmas

In last month’s Designer Paper Class we had fun with Painted Christmas Paper!
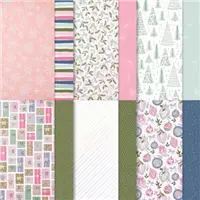
The design on this paper was hand painted, then printed for DSP.
It is gorgeous paper that only needed a greeting and some layers
to create this simple Christmas card.

Painted Christmas Designer Paper, Holly Jolly Wishes Stamp Set, Designer Paper Class, Christmas Card, Stamp with Peggy

When I look at the Designer Paper, it looks so real, like you can
touch the berries and they would be raised up but they aren’t.

I love doing these Designer Paper Classes.
Each month you get a sampling of 36-48 — 4″ x 6″ sheets of papers
along with coordinating cardstocks plus and embellishment.
I design 6 different cards and mail you the kits to complete
the cards on your own.  This is such a great way to get a little
of a bunch of papers and then some ideas on different ways to use them.

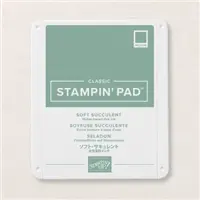
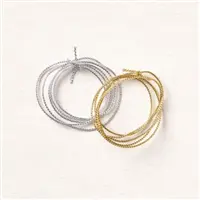
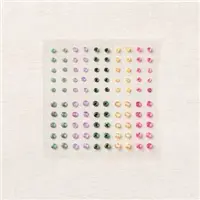
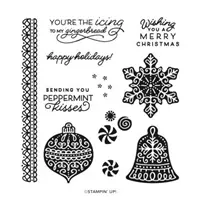
Here is the SUPPLY LIST for this project.
Click on any of the products to go right to my
Stampin’ Up! store:
I APPRECIATE YOU TAKING THE TIME.
YOUR COMMENTS AND ORDERS ARE ALWAYS APPRECIATED!

Receive a 5 card project tutorial from me when you place an order of $35 or more
during the month of November.
This tutorial set will not be featured on my blog — it’s an ordering exclusive
(Club orders do not qualify).Please use the host code below when placing your order.

CURRENT HOST CODE


Host Code, Stamp with Peggy


Use this host code to place your online order with me.

If your order is over $150 DO NOT use the code,
you’ll get your own Stampin’ Rewards from Stampin’ Up!
Just copy and paste this code NZ279DWM when placing your order.

FOLLOW ME….

Facebook: https://www.facebook.com/StampWithPeggy/
Pinterest: https://www.pinterest.com/peggymurwin/
YouTube:  https://www.youtube.com/channel/UCzWMDTQVYAhveWgCr5g6FkQ

Share this!

Time of Giving Snowflakes

I love this Time of Giving Snowflakes Christmas Card!!

This card uses the Time of Giving Bundle — stamp set and Giving Gifts Dies
to create a quick but elegant Christmas card.

Time of Giving Bundle, Time of Giving Stamp Set, Gift Giving Dies, Christmas, Facebook Live, Stamp with Peggy


Measurements:

Thick Basic White — 5 1/2″ x 8 1/2″ — score at 4 1/4″

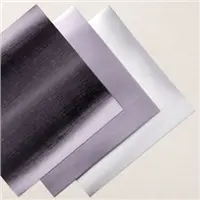
Silver Foil Specialty Pack (darkest one) — 4″ x 5 1/4″
Misty Moonlight — 3 7/8″ x 5 1/8″
Basic White — 3 5/8″ x 4 7/8″
Misty Moonlight — 1 1/4″ x 3″
Basic White — 1 1/8″ x 2 7/8″

This was the card I made during last night’s Facebook Live.

You can watch it here:


I do a Facebook Live every Monday night at 7:00 p.m.

I would love to have you join me!!

Here is the SUPPLY LIST for this project.
Click on any of the products to go right to my
Stampin’ Up! store:
I APPRECIATE YOU TAKING THE TIME.
YOUR COMMENTS AND ORDERS ARE ALWAYS APPRECIATED!

Receive a 5 card project tutorial from me when you place an order of $35 or more
during the month of November.
This tutorial set will not be featured on my blog — it’s an ordering exclusive
(Club orders do not qualify).Please use the host code below when placing your order.

CURRENT HOST CODE


Host Code, Stamp with Peggy


Use this host code to place your online order with me.

If your order is over $150 DO NOT use the code,
you’ll get your own Stampin’ Rewards from Stampin’ Up!
Just copy and paste this code NZ279DWM when placing your order.

FOLLOW ME….

Facebook: https://www.facebook.com/StampWithPeggy/
Pinterest: https://www.pinterest.com/peggymurwin/
YouTube:  https://www.youtube.com/channel/UCzWMDTQVYAhveWgCr5g6FkQ

Share this!

Delicate Bauble Joy Card

Fun with this Delicate Bauble Joy Ornament Card.
The Wintry 3D Embossing Folder added fun snowflake background


Delicate Baubles Dies, Sparkle of the Seasons Stamp Set, Wintry 3D Embossing Folder, Christmas, Stamp with Peggy
This was such a fun card to make — simple but so elegant.

Measurements:

1. I started with a 5 1/2″ x 8 1/2″ Thick Basic White card base.
2. A Misty Moonlight layer — 3 3/4″ x 5 1/2″ is added to card base with Dimensionals.
3. Next is a layer of Basic White 3 1/2″ x 5 1/2″ — I cut out the center using the
Delicate Baubles Die — then it is embossed with the Wintry 3D Embossing Folder – Snowflakes
and adhered to Misty Moonlight layer.
4. Die cut the center cut out from step 3 using the Joy die.
5. Adhere to Misty Moonlight through cut out using Multipurpose Liquid Glue (“green” glue).
6. Stamp greeting with Misty Moonlight on 1/2″ x 2 3/4″ Basic White
7. Adhere to 5/8″ x 2 7/8″ Misty Moonlight
8. Attach to card front with Dimensionals

I am loving this Delicate Bauble Die Set.
I have a class later this month using these dies and making some fun
punch art cards along with the more intricate cards like this one.
I can’t wait to share those with you too.

Join me for my Facebook Live at 7:00 p.m. tonight, Monday, November 8.

Here is the SUPPLY LIST for this project.
Click on any of the products to go right to my
Stampin’ Up! store:
I APPRECIATE YOU TAKING THE TIME.
YOUR COMMENTS AND ORDERS ARE ALWAYS APPRECIATED!

Receive a 5 card project tutorial from me when you place an order of $35 or more
during the month of November.
This tutorial set will not be featured on my blog — it’s an ordering exclusive
(Club orders do not qualify).Please use the host code below when placing your order.

CURRENT HOST CODE


Host Code, Stamp with Peggy

Use this host code to place your online order with me.
If your order is over $150 DO NOT use the code,
you’ll get your own Stampin’ Rewards from Stampin’ Up!
Just copy and paste this code NZ279DWM when placing your order.

FOLLOW ME….

Facebook: https://www.facebook.com/StampWithPeggy/
Pinterest: https://www.pinterest.com/peggymurwin/
YouTube:  https://www.youtube.com/channel/UCzWMDTQVYAhveWgCr5g6FkQ

Share this!