Color Me Happy Thanks

Fun new products to share.  That’s one of the things I love about being a Stampin’ Up! demonstrator.  One of our newest products on the market is Stampin’ Blends Markers.  I shared a little about them last week but you can never see enough of these fun markers.  I LOVE using them, hey color so well.

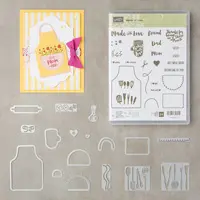
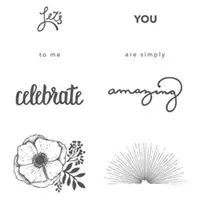
Here’s a card we made using the Stampin’ Blends Alcohol Markers and the new Color Me Happy stamp set.  These markers color so well, it is awesome.

Color Me Happy Stamp Set, Stamp Blends, Thank You Card
Measurements:
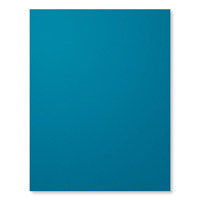
Bermuda Bay
– 5 1/2″ x 8 1/2″ — score at 4 1/4″
Whisper White – 4″ x 5 1/4″
Calypso Coral – 3 1/4″ x 4 1/2″
Whisper White – 3″ x 4 1/4″ — score images with Memento ink — color with Light Bermuda Bay, Dark Bermuda Bay, Light Calypso Coral, Dark Calypso Coral Stampin’ Blends and Color Lifter.  Used Dark Calypso Coral Stampin’ Blend markers to color pearls

Supplies Used:

Share this!

Lots of Big News

WOW!!  What a great time I had at On Stage.  I spent 3+ days with my sister, Tina, my daughter, Katie, two team members, Sandi & Wendy, two sister demos, Amanda & Leslie and a demo friend, Cathy.  We learned lots, had lots of fun, came home with new products and ready to show you lots of fun new things.  I’ll share a few more pictures tomorrow but today I want to introduce you to a fabulous new tool that was introduced to us at On Stage.  I was part of a group of demonstrators that worked with Stampin’ Up! to produce this new tool called the Stamparatus!!!

The Stamparatus is a fabulous new stamp placement tool.  It will help you line up a stamped image or stamp an image over and over and over in just the right spot.  Check out Stampin’ Up!’s video giving you 5 Things You Should Know About the Stamparatus!!!

If you can’t view the video, click here to watch it.

Here’s just a few reasons why you NEED the new Stamparatus!!!

  • Make multiples with ease
  • Consistently stamp crisp, clean images
  • If you want a darker impression, apply more ink and restamp—no need to start over
  • Make fewer mistakes, saving time and money
  • Easily create 2-step, 3-step, and 4-step stamped images using reversible plates
  • Develop new and specialized stamping techniques with adjustable stamping plates and precision placement
    Here’s a few product details!

    • Compatible with Stampin’ Up!’s red rubber and photopolymer stamp
    • Foam mat to use with photopolymer stamps
    • Rulers and gridlines for quick measuring
    • 2 open sides so you can stamp on larger paper
    • 2 reversible plates: a total of 4 surfaces to work with
    • 2 magnets to hold the paper in place
    • Magnet storage areas
    • Retail Price–$49.00 US

I will post more information on the Stamparatus on Thursday, November 16th — this is the first day you can RESERVE your very own Stamparatus (they won’t ship until February).

This tool is amazing and you are definitely going to want to reserve one right away.  Watch for more details and a link to reserve your own Stamparatus on Thursday.


Share this!

Thanksgiving Table Favors

Thanksgiving is right around the corner and I have a fun little project that you can make for each table setting.  This adorable matchbox style treat holder has a piece of chocolate for each guest at your table.

Gourd Goodness, Decorative Ribbon Punch, Treat Holder
Gourd Goodness stamp set, Painted Autumn Designer Paper, Decorative Ribbon Punch, Treat Holder
Measurements:
Cover:
Cajun Craze
– 2 3/4″ x 7 1/8″  — score at 2 7/8″, 3 3/8″, 6 1/4″, 6 1/2″
Very Vanilla – 2 1/2″ x 2 1/2″ — stamp pumpkins with Peekaboo Peach and Tangerine Tango — stamp stems with Pear Pizzazz and Old Olive — stamp Thank Goodness for You with Early Espresso
Early Espresso – 1″ x 2 3/4″ — punch with Decorative Ribbon Punch
Inside Pocket:
Cajun Craze
– 2 1/2″ x  5 7/8″ — score at 2 1/4″, 2 1/2″, 2 3/4″, 5″, 5 1/4″, 5 1/2″ — fold on score lines creating mountain and valleys — put Tear and Tape on 3/8″ flap  and across bottom — adhere together to create a small pocket
Painted Autumn Designer Paper — 2″ x 2 1/4″ — attach to front of pocket — put three dimensionals across bottom of pocket — attach to flap from cover.  I tucked a Ghiradelli chocolate inside the pocket

Supplies Used:


Share this!