Seasonal Chums Meets Spooky Cat

This past weekend I held a Team Getaway — 11 team members spent the weekend together in a craftin’ retreat center doing whatever we wanted to do.  This is about the 5 year we have done this and it is such a fabulous bonding time.  Everyone is assigned in pairs to cover meals and desserts.  We have such wonderful meals and so many great snacks all day long.  The only planned activity is a shoe box swap.  This means each person designed a project and cut supplies for the other 11 people.  All the supplies are put in a box and anytime throughout the weekend we each would grab a box and make that project, so at the end of the weekend we went home with our own sample item and 11 other completed items.  Everyone did a great job — I am so proud of them, I want to share the projects with you over the next few days.

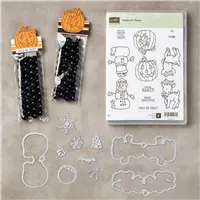
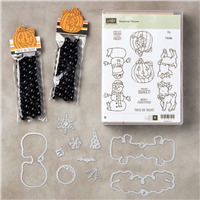
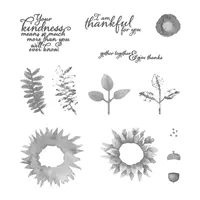
The first project used the Seasonal Chums stamp set and coordinating framelits and the Cat Punch from the Spooky Nights Suite.

Seasonal Chums stamp set, Seasonal Tags Framelits, Cat Punch, Halloween, Treat Holder
Isn’t this just the cutest!!!  We stamped the pumpkin tag from the Seasonal Chums stamp set — colored it with Watercolor Pencils — Pumpkin Pie, Daffodil Delight, Early Espresso and Old Olive — cut it out with the coordinating Seasonal Tags Framelits and then cut the top of the pumpkins off zig zag like a jack-o-lantern.  Then we used the Cat Punch to add black cats to the back of each pumpkin.  A little box was created to attach the pumpkins to that holds two Rolo candies.

Seasonal Chums stamp set, Seasonal Tags Framelits, Cat Punch, Halloween, Treat Holder
Let’s Make It:
Watercolor Paper – 2″ x 4″ — stamp pumpkin tag with Black ink — cut out with Seasonal Tag Framelits — color with Watercolor Pencils — cut tops off zig zag
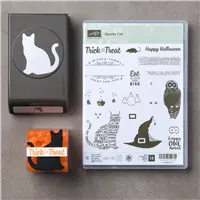
Black – 2″ x 4″ — punch out two black cats — stamp faces from Spooky Cat stamp set with Whisper White ink
Black – 2″ x 2″ — score 1/2″ all four sides — cut small tabs to score line
Seasonal Chums Stamp Set, Seasonal Tags Framelits, Halloween, Treat Holder
Fold on all score lines.  Put adhesive or glue dot on small tabs and attach to create little box.
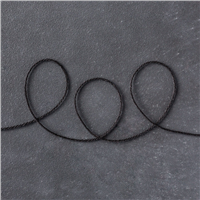
Attach cats and pumpkins.  Tie ribbon and Black Bakers Twine to decorate the front.  I can’t wait to see your fun little treat holder.

Supply List:

Share this!

Painted Harvest Christmas Wreath

Today I have a fun, different way to use the Painted Harvest stamp set.  We made a Christmas wreath using the sunflower stamps.  I love the simplicity of this card.  I used the Merry Mistletoe stamp set for the greeting and added a little bow to the wreath.  So sweet and simple.


Painted Harvest stamp set, Merry Mistletoe stamp set


Measurements:
Real Red – 4 1/4″ x 11″ — score at 5 1/2″
Wild Wasabi – 3 7/8″ x 5 1/8″
Whisper White – 3 5/8″ x 4 7/8″ — stamp larger flower twice in Wild Wasabi ink (turning stamp a little second time), stamp smaller flower in Garden Green ink — stamp dots with Real Red — stamp Merry Christmas with Real Red
1/8″ Real Red Ribbon – 10″ — tie small bow, attach with Mini Glue Dot

Supply List:


Share this!

Gather Together & Give Thanks

The Painted Autumn Suite works well for some fun Fall cards or even masculine cards.  This one is great for Thanksgiving — Gather Together & Give Thanks with falling acorns — perfect!  Today’s card has lots of texture — Pinewood Planks Dynamic Embossing Folder for the background, 5/8″ Burlap Ribbon topped with 1/4″ Copper Trim, then add in some Copper Metallic Thread — WOW!  We added the Painted Autumn designer paper of falling acorns and a label with the fabulous greeting and more acorns punched out with the Pretty Label punch.  Both the acorn designer paper and the label are backed with Cajun Craze which is such a fall color to me.


Painted Autumn Suite, Painted Harvest Stamp Set, Painted Autumn Designer Paper, Pretty Label Punch, 5/8" Burlap Ribbon, 1/4" Copper Trim, Thanksgiving


Let’s Make It:

Chocolate Chip – 4 1/4″ x 11″ — score at 5 1/2″
Cajun Craze – 2 1/4″ x 5 1/2″
Painted Autumn Designer Paper – 2″ x 5 1/2″
5/8″ Burlap Ribbon – 4″ — cut banner ends
1/4″ Copper Trim – 4″ — layer on top of the burlap ribbon
Cajun Craze – 2″ x 3 1/2″ — punch with Pretty Label Punch — cut in half long way
Very Vanilla – 2″ x 3 1/2″ — punch with Pretty Label Punch — stamp greeting and acorns with Chocolate Chip ink
attach Cajun Craze half label to top and bottom of stamped label
Copper Metallic Thread — 12″ — wind around three fingers and attach to back of label with dimensionals
Very Vanilla – 4″ x 5 1/4″ — attach inside card to write message

Supply List:

Share this!