Happy Fall Eclipse Frame

The hottest new trend in paper crafting is the Eclipse technique.  It is definitely a WOW factor and catches everyone’s attention.  At our Team Getaway last weekend, Sheila’s project featured this fun technique so everyone learned how to do it.

Painted Harvest Stamp Set, Large Letters Framelits, framed art, Fall
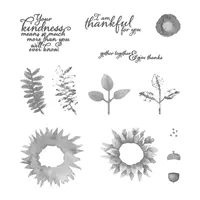
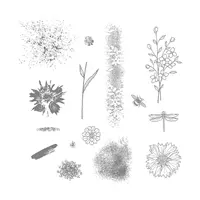
For this fun technique we stamped the Very Vanilla piece with the Painted Harvest stamp set (Daffodil Delight, Garden Green, Early Espresso inks).  We added a few speckles using the retired Gorgeous Grunge stamp set (you can substitute Touches of Texture stamp set).  Then you use the Large Letters Framelits to cut F A L L from this stamped piece.  Attach Very Vanilla to Pumpkin Pie and Early Espresso cardstocks.  Attach the letters in the opening with the Foam Adhesive Strips.

You really have to try this technique — a definite reason everyone needs the Large Letters Framelit Set.

Supply List:

Share this!

Wrapped in the Warmth of Christmas

I have another great card from our shoe box swap this past weekend.  One of my Team Members, Sandi, designed this card.  Like many of us, Sandi is a great collector but gets a bit shy to make a card by herself.  I think she did a great job — don’t you?  I would love for you to leave a comment about Sandi’s card.  I will draw one name from all the comments and send a little thank you for participating.

The Snowflake Sentiment stamp set and Silver Embossing Powder was used for the greeting — Wrapped in the Warmth of Christmas.  I just love that greeting and the plaid designer paper from Christmas Around the World designer paper makes me think of a nice warm blanket.

Snowflake Sentiment Stamp Set, Christmas Around the World Designer Paper, Triple Banner Punch, Jute Twine, Layering Circles, Christmas
Let’s Make the Card:
Garden Green
– 5 1/2″ x 8 1/2″ — score at 4 1/4″
Black – 3 1/2″ x 4 1/2″
Christmas Around the World Designer Paper – 3″ x 4″
Real Red – 2″ x 4″ — punch one end with Triple Banner Punh
Black – 3 1/2″ x 3 1/2″ — cut out circle with Layereing Circles Framelits
Whisper White – 3 1/2″ x 3 1/2″ — stamp greeting with VersaMark ink — heat emboss with Silver Embossing Powder — cut out with Layering Circles Framelits
Jute Twine – 5″ — wrap around Black layer — 10″ — tie a bow and attach with Glue Dot

Don’t forget to leave a comment — I know Sandi would love them.

Supply List:

Share this!

Creep It Real Goblins Are Fun!!

I finally gave in and bought the Creep It Real stamp set.  I held out getting it because I “needed” the Spooky Cat bundle and figured I didn’t need another Halloween stamp set but I kept seeing so many fun things that I finally caved and ordered it.  Then I saw a card I loved designed by Brian King, I knew I made the right decision.  I started playing with Brian’s design while I was working on my shoe box swap for this past weekend’s Team Getaway.  I think mine version turned out pretty cute — what do you think?

Creep It Real Stamp Set, Spooky Night designer paper, Halloween
I love the fold on this card — I call it a swinging gate fold.  It reminds me of the old barn doors that opened half top and half bottom.  Here’s the card from the side so you can see the fold.

Creep It Real stamp set, Spooky Night Designer Paper, Halloween
Let’s Make The Card:
Pumpkin Pie
– 4 1/4″ x 11″ — score at 5 1/2″ — put the 11″ side across paper trimmer and cut at the score line down 2″ — turn cardstock (4 1/4″ across top) and cut from the score line down at the 2″ — you are taking out a 2″ x 5 1/2″ section of the top of the card
Black – 4″ x 5 1/4″ (inside
Whisper White – 3 7/8″ x 5 1/8″ — stamp Creep It Real at an angle with Memento ink filling the whole sheet
Spooky Night designer paper – 2″ x 5 1/4″
Black – 3″ x 4 1/4″
Pumpkin Pie – 2 3/4″ x 4″
Black – 2″ x 3 1/4″
Whisper White – 1 3/4″ x 3″
Wisteria Wonder – 2″ x 2″ — stamp Frankenstein with Memento ink — cut out with Paper Snips
Pumpkin Pie – 2″ x 2″ — stamp pumpkin with Memento ink — cut out with Paper Snips
Lemon Lime Twist – 2″ x 2″ — stamp witch with Memento ink — cut out with Paper Snips
Attach three images with dimensionals

This was so much fun to make and quick to — even with the fussy cutting.

Supply List:


Share this!