Happy Halloween Witches Hats

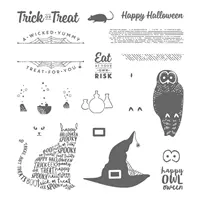
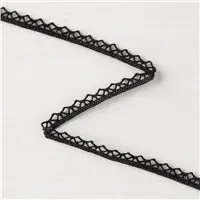
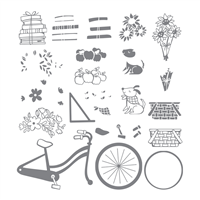
The Spooky Nights designer paper stands on its own — it can be the main focus of your card like this card created by team member Amanda.  All the fun dancing witches hat draw my eyes right into the card.  The Happy Halloween comes from the Spooky Cats stamp set — add a few polka dots with the Polka Dot Basics Embossing Folder and a great lace trim with the Decorative Ribbon Border — so adorable.


Measurements:
Black – 5 1/2″ x 8 1/2″
Pumpkin Pie – 4″ x 5 1/4″
Spooky Nights Designer Paper – 2 1/2″ x 5 1/4″
Black – 1″ x 5 1/4″ — punch with Decorative Ribbon Border
Black – 2 3/4″ x 2 3/4″ — cut scallop circle with Layering Circles Framelit
Pumpkin Pie – 2 3/4″ x 2 3/4″ — cut circle with Layering Circles Framelit
Very Vanilla – 2 1/2″ x 2 1/2″ — stamp greetings with Memento and Pumpkin Pie inks – cut out circle with Layering Circles Framelits

Not bad at all — have fun!!!

SUPPLIES USED:


Share this!

Creep it Real

Creep it Real!!!  I realize many people aren’t “into” Halloween.  I LOVE the Halloween Color Combo — black and orange — fun designs.

I really like cutesy — do not like scary, creepy at all.  The Creep it Real stamp set is so darn adorable. The images are so cute!!!

Here’s a card that features one of the phrases in the stamp set — for REAL (heehee) — not creepy at all, just darn cute.  The Spooky Night designer paper is a main focus to me.


Creep it Real stamp set, Spooky Night Designer Paper, Vintage Crochet Trim, Halloween


Measurements:
Thick Whisper White 
– 5 1/2″ x 8 1/2″ — score at 4 1/4″
Pumpkin Pie – 3 1/4″ x 4 1/2″
Spooky Night Designer Paper – 3 1/8″ x 4 3/8″
Pumpkin Pie – 2 3/4″ x 3 1/2″
Vellum – 2 3/4″ x 3 1/2″
Vintage Crochet Trim – 5″

Stamping Tips:
1. Use the Layering Ovals Framelits to cut an oval with Pumpkin Pie and Vellum cardstocks.
2. Stamp “Creep it Real” and the pumpkin with Black ink.
3. Then on the backside of the vellum color the pumpkin with Pumpkin Pie Marker.
4. Punch two 1/8″ holes and thread the Vintage Crochet Trim through holes and tie a knot.

Supplies Used:

Share this!

School = Fall Starting

It’s back to school time which means fall is beginning.  We are still have some warm, sunny days but the nights are cooling way down (a little Indian Summer).  For my September scrapbook pages I wanted a back to school feel but most in the group don’t have school age children anymore.  I couldn’t go full fall quite yet so I settled on a fun combination – apples and a wagon full of vegetables on some fun primary colors.

September Scrapbook, Bike Ride, Grown With Love
I used the Bike Ride stamp set on page 1 to stamp the row of apples in the center — Memento ink for the outlines and Real Red for the inside of the apples.

September Scrapbook, Bike Ride
Measurements:
Pear Pizzazz – 12″ x 12″
Black – 3 top rectangles — 3 1/2″ x 5″
                center strip — 1 1/2″ x 12″
3 bottom squares — 3 1/2″ x  3 1/2″
Whisper White – 1 1/4″ x 12″ — stamp apples
Pacific Point 
– top — 3 1/4″ x 4 3/4″
bottom — 3 1/4″ x 3 1/4″
Real Red – top — 3 1/4″ x 4 3/4″
bottom — 3 1/4″ x 3 1/4″

Of course there has to be a coordinating page — here is page 2


September Scrapbook, Grown with Love stamp set


This time I used the Grown with Love stamp set — love this set!!!  I used markers to color the rubber on the stamp — Real Red and Black for the wagon — Real Red, Old Olive, Tangerine Tango, Fresh Fig, Black for the words and veggies.

Measurements:
Pear Pizzazz – 12″ x 12″

Black – 3 1/2″ x  3 1/2″
Whisper White – 3 1/4″ x 3 1/4″ — stamp wagon and veggies
Pacific Point 
– 3 1/4″ x 3 1/4″

Real Red – 3 1/4″ x 3 1/4″

Supplies Used:


Share this!