Here's another card using the Paisleys & Petals stamp set. We also used the Pretty Paisleys embossing folder.

Rich Razzleberry and Night of Navy go together very well. This card is very quick and easy to make.


Here's another card using the Paisleys & Petals stamp set. We also used the Pretty Paisleys embossing folder.
Rich Razzleberry and Night of Navy go together very well. This card is very quick and easy to make.
The Holiday Catalog is full of fun new products.
One of my favorites is this Copper Foil Paper.
This card uses the Paisleys & Poisies stamp set and
coordinating Paisleys framelit.

This coordinates well with Crumb Cake cardstock and ink,
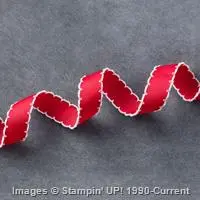
Early Espresso ink, Copper Foil Paper and Linen Thread.
New Catalog is Here,
New Catalog is Here!!!
Yesterday we could start ordering from the new
Holiday Catalog and it is amazing.
I would love to hear what some of your favorite items are.
I have been playing a bit with some of the new items
and I promised you are going to love it.
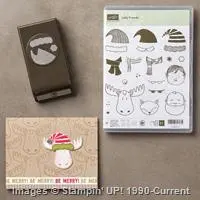
Here is a fun sample using the Jolly Friends stamp set and the Merry Medley background.
Best news is — it comes with a fabulous punch that punches out a Santa hat.

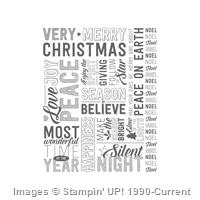
The Merry Medley background stamp is fabulous.
I ordered it in the clear mount and cut it all apart — Silent Night
Most wonderful time of year, etc. so instead of one awesome background stamp I now have words for tons of cards.
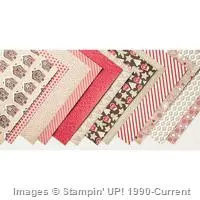
In this sample it is stamped on Crumb Cake cardstock with Crumb Cake ink — ink up BELIEVE with Real Red marker and color in the words, right on the stamp. Very Vanilla cardstock the the moose’s head.
Candy Cane Lane designer paper for the hat.
Early Espresso ink for the hat brim.