Beautiful Fall Plaque Frame

During last night’s Facebook Live we created this beautiful Fall plaque frame.

I used several stamp sets from the Holiday Catalog — Pretty Pumpkin Bundle,
Gorgeous Leaves Stamp Set, Nature’s Harvest, Well Defined and Sparkle of the Seasons.


I found these plaque frames in my stash and they worked GREAT for this project.
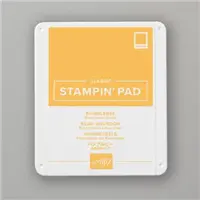
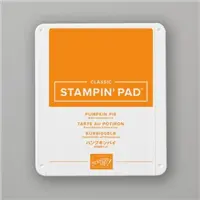
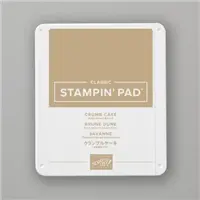
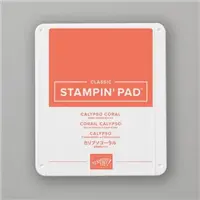
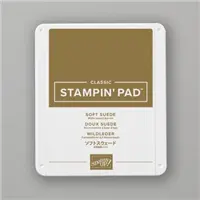
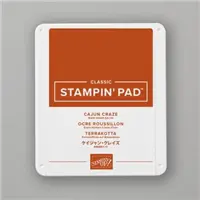
I used Memento, Cajun Craze, Bumblebee and Soft Suede inks plus

Stampin’ Blends to color the pumpkins and flowers.

Pretty Pumpkin Bundle, Gorgeous Leaves Stamp Set, Nature's Harvest Stamp Set, Well Defined Stamp Set, Fall, Frame, Stamp with Peggy
The pumpkins and leaf vine were stamped with Memento and colored with Stampin’ Blends.

Pretty Pumpkin Bundle, Gorgeous Leaves Stamp Set, Nature's Harvest Stamp Set, Well Defined Stamp Set, Fall, Frame, Stamp with Peggy
These cone flowers are from Nature’s Harvest.
I used Dark Daffodil Delight Stampin’ Blends to color the flowers and added
Light Pumpkin Pie accents around the tips of the petals.

Pretty Pumpkin Bundle, Gorgeous Leaves Stamp Set, Nature's Harvest Stamp Set, Well Defined Stamp Set, Fall, Frame, Stamp with Peggy
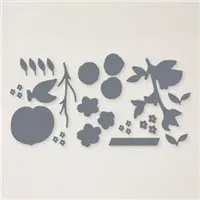
The pumpkin is cut from Cajun Craze using the Pretty Pumpkin Die.
Grateful is from Sparkle of the Seasons stamp set.
A Linen Thread bow adds the final detail to the pumpkin.

Pretty Pumpkin Bundle, Gorgeous Leaves Stamp Set, Nature's Harvest Stamp Set, Well Defined Stamp Set, Fall, Frame, Stamp with Peggy
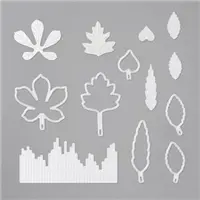
These leaves are from the Gorgeous Leaves Stamp Set.

Click Here To Watch the Video

Did you like this project?  Would you like to make it yourself?
I have 5 kits including the plaque frame that I am giving away 

to the first 5 people to place a $50 order by Friday, October 29th.
Use Host Code NZ279DWM when placing your order.

Here is the SUPPLY LIST for this project.
Click on any of the products to go right to my
Stampin’ Up! store:
I APPRECIATE YOU TAKING THE TIME.
YOUR COMMENTS AND ORDERS ARE ALWAYS APPRECIATED!

Receive a 5 card project tutorial from me when you place an order of $35 or more
during the month of October.
This tutorial set will not be featured on my blog — it’s an ordering exclusive
(Club orders do not qualify).

Please use the host code below when placing your order.

CURRENT HOST CODE


Host Code, Stamp with Peggy

Use this host code to place your online order with me.
If your order is over $150 DO NOT use the code,
you’ll get your own Stampin’ Rewards from Stampin’ Up!
Just copy and paste this code NZ279DWM when placing your order.

FOLLOW ME….

Facebook: https://www.facebook.com/StampWithPeggy/
Pinterest:https://www.pinterest.com/peggymurwin/
YouTube:  https://www.youtube.com/channel/UCzWMDTQVYAhveWgCr5g6FkQ

Share this!

Fall Fest Project 4

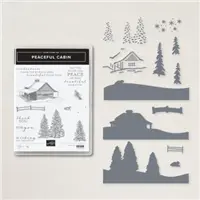
Fall Fest Project 4 featured the Peaceful Cabin Suite, the stamp set, Cabins Dies and the 
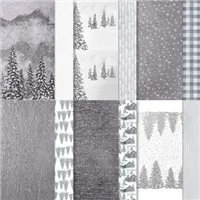
Peaceful Place Designer Paper.
This cabin reminds me of my mom and dad’s cabin, which my dad built years ago.
Their grandkids all grew up spending weekends there in the summer
and now the great grandkids spend time there at least one weekend each summer.

Peaceful Cabin Bundle, Peaceful Place Designer Paper, Fun Folds, Christmas Ornament, Treat Holder, Cash Holder, Fall Fest, Stamp with Peggy

This project we made a layered card with the beautiful designer paper in the
background and
the cabin and trees in the front.

Peaceful Cabin Bundle, Peaceful Place Designer Paper, Fun Folds, Christmas Ornament, Treat Holder, Cash Holder, Fall Fest, Stamp with Peggy


The Designer Paper with the trees is so pretty and so real looking.

Then we stamped trees and die cut them adding a couple of extra trees to fill in the open spaces.
The cabin is stamped and die cut which adds another layer.
I love the fox beside the cabin and the fence added to the right.

Peaceful Cabin Bundle, Peaceful Place Designer Paper, Fun Folds, Christmas Ornament, Treat Holder, Cash Holder, Fall Fest, Stamp with Peggy

We decorated the inside with the greeting and a couple of trees.

Peaceful Cabin Bundle, Peaceful Place Designer Paper, Fun Folds, Christmas Ornament, Treat Holder, Cash Holder, Fall Fest, Stamp with Peggy

The second card idea came from Terri Gaines, a fellow Demo in Minnesota.
I’ve done cards before with the strips on the side but loved this bridge across the front of the card.
I knew this was perfect for Fall Fest.
We added Shimmery Crystal Effects to the cabin where the snow shows.

Peaceful Cabin Bundle, Peaceful Place Designer Paper, Fun Folds, Christmas Ornament, Treat Holder, Cash Holder, Fall Fest, Stamp with Peggy


The top layer lifts up showing the amazing Designer Paper layer underneath.
So much fun and you can see the layers with the trees and cabin.


Then that layer lifts showing the inside of the card with the greeting
ready for you to sign the card.

Peaceful Cabin Bundle, Peaceful Place Designer Paper, Fun Folds, Christmas Ornament, Treat Holder, Cash Holder, Fall Fest, Stamp with Peggy

How about an ornament for the tree?
I ordered these wood slices from Amazon.
We stamped right on the wood, added some Rhinestones for a little bling,
then added the twine for hanging.

We finished this project with a treat holder that stores a candy bar and cash or gift card.

Peaceful Cabin Bundle, Peaceful Place Designer Paper, Fun Folds, Christmas Ornament, Treat Holder, Cash Holder, Fall Fest, Stamp with Peggy

The left side holds cash, check or a gift card.


Peaceful Cabin Bundle, Peaceful Place Designer Paper, Fun Folds, Christmas Ornament, Treat Holder, Cash Holder, Fall Fest, Stamp with Peggy


The Designer Paper is showcased in the middle.

A candy bar is tucked into the pocket on the right side.

For Project 4 everyone received a Shimmery Crystal Effects and a package of Rhinestones.


Merriest Moments – Project 3
Sparkle of the Seasons — Project 2
Gorgeous Leaves — Project 1

Here is the SUPPLY LIST for this project.
Click on any of the products to go right to my
Stampin’ Up! store:

I APPRECIATE YOU TAKING THE TIME.
YOUR COMMENTS AND ORDERS ARE ALWAYS APPRECIATED!

Receive a 5 card project tutorial from me when you place an order of $35 or more
during the month of October.
This tutorial set will not be featured on my blog — it’s an ordering exclusive
(Club orders do not qualify).

Please use the host code below when placing your order.

CURRENT HOST CODE


Host Code, Stamp with Peggy

Use this host code to place your online order with me.
If your order is over $150 DO NOT use the code,
you’ll get your own Stampin’ Rewards from Stampin’ Up!
Just copy and paste this code J2SFP94E when placing your order.

FOLLOW ME….

Facebook: https://www.facebook.com/StampWithPeggy/
Pinterest:
https://www.pinterest.com/peggymurwin/
YouTube:  https://www.youtube.com/channel/UCzWMDTQVYAhveWgCr5g6FkQ

Share this!

Fall Fest Project 3

Fall Fest Project 3 featured the Merriest Moments Bundle.
This bundle is absolutely amazing.

The bundle includes the stamp set, an embossing folder and dies.
The amazing part one of the dies fits inside the embossing folder so you can 
emboss and cut at the same time.  It is so beautiful.


Merriest Moments Bundle, Fall, Christmas, Fall Fest, Stamp with Peggy


We made three fall cards and 4 Christmas/Holiday Cards


Here we used the stamp pads with Blending Brushes to color the embossed die cut — such a beautiful look.


Again we colored the embossed die cut with the Blending Brushes and stamp pads,
then we cut the embossed piece in half to use on both cards.
The Timbers Embossing Folder add more texture to the card.


We used Bumblebee cardstock for this card and embossed it with the Bark Embossing Folder.


Merriest Moments Bundle, Fall, Christmas, Fall Fest, Stamp with Peggy


We used the stamps for this card along with the die cuts to cut out the stamped images.


White on White doesn’t show great in a photo but this card is amazing.
We stamped and die cut the greenery and added Decorative Matte Dots for the holly berries.


I love the addition of the Wonderful Snowflakes with the embossed background.


The final card has lots of shimmer and shine.

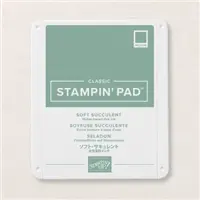
We used a Sponge Dauber with White Craft Ink to add white to the Soft Succulent embossed die cut
and then added Wink of Stella for the shimmer.

Everyone received a package of 3 Blending Brushes and Decorative Matte Dots!!


If you missed the first two Fall Fest projects, you can check them out by clicking on the links below:

Project 2 – Sparkle of the Season

Project 1 — Gorgeous Leaves


Here is the SUPPLY LIST for this project.
Click on any of the products to go right to my
Stampin’ Up! store:


I APPRECIATE YOU TAKING THE TIME.
YOUR COMMENTS AND ORDERS ARE ALWAYS APPRECIATED!

Receive a 5 card project tutorial from me when you place an order of $35 or more
during the month of October.
This tutorial set will not be featured on my blog — it’s an ordering exclusive
(Club orders do not qualify).

Please use the host code below when placing your order.

CURRENT HOST CODE


Host Code, Stamp with Peggy

Use this host code to place your online order with me.
If your order is over $150 DO NOT use the code,
you’ll get your own Stampin’ Rewards from Stampin’ Up!
Just copy and paste this code J2SFP94E when placing your order.

FOLLOW ME….

Facebook: https://www.facebook.com/StampWithPeggy/
Pinterest:https://www.pinterest.com/peggymurwin/
YouTube:  https://www.youtube.com/channel/UCzWMDTQVYAhveWgCr5g6FkQ

Share this!