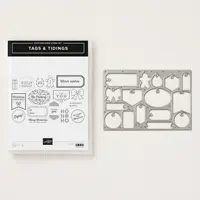
We all need tags for our Christmas gifts, right!!! I have a quick and easy way for you to make a bunch of tags and be ready for wrapping those presents. The Tags & Tidings Bundle is perfect — it is one stamp that stamps 16 tags and a coordinating framelit that cuts out all 16 tags at one time — WOOHOO!!!
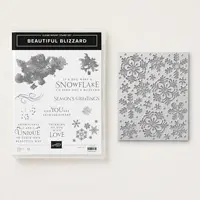
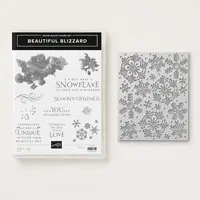
Wow, our temperatures have dropped about 40 degrees in a week. There were snow flurries all around over the weekend. I know we aren’t ready for this but I do have some fun snowflakes to share with you today. The Stampin’ Up! video today features the Beautiful Blizzard bundle. This is a gorgeous stamp set and framelit that cuts out a whole sheet of snowflakes at one time. You can use the negative from the snowflakes as a stencil for wonderful backgrounds for your cards or scrapbooks.
This week is a bit wild and crazy as I’m preparing for my Fall Fest Mini Retreat. I host this all day stamping event with my daughter (who is also a team member). We have a day filled full of stamping for our guests and lots of surprise and delights for them too. So while I’m busy prepping and will share the project with you starting next week, I thought this would be a great time to share some of Stampin’ Up!’s videos from the Holiday Catalog.
One of my favorite products in this catalog is the Tin Tile Embossing Folder. I’ve used it a ton of times already. One project that featured this embossing folder was the Country Home Framed Art piece we did last month. Click here to view that post.
See enjoy this quick little video on some of the fun ways to use the Tin Tile Embossing Folder.