Fun at Summer Splash Stamping Event

Saturday was my Summer Splash Stamp Event with three of my team members.  We stamped ten cards, have four demonstrations, a salad bar for lunch and an ice cream bar for dessert.  It was a bit warm but everyone pushed through the heat and had a blast together.

Summer Splash
We had a goodie bag for everyone and we put these fun popsicle treat holders inside — of course we put chocolate inside the boxes, what else would you put in them.

Popsicle Treat Holder
Summer Splash, Popsicle Treat Boxes
Here’s a close up picture of the popsicle boxes.  They were easy to make — I saw the idea on Facebook by another demonstrator.

Measurements:
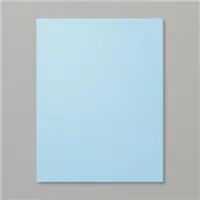
Box Base
– 4″ x 4 1/2″ — score 1″ on all 4 sides — cut on the score lines as shown
Box Cover – 2 1/2″ x 7 1/4″ — score at 1 1/16″, 3 1/8″, 4 3/16″, 6 1/4″

Summer Splash, Popsicle Treat Box Template


Fold on all score lines.  Box Base — put adhesive on 1″ tabs, fold up and attach to create box.
I found short popsicle sticks at Michaels — I put a 1/2″ piece Tear & Tape on one end and attach to bottom side of box.
I used the Artisan Textures stamp set to stamp “ice” on the box cover.  Wrap cover around box and adhere 1 1/16″ edge over 1″ end.  Now your box will slide out of the cover.


Share this!

Stylish Christmas in July

It’s time for a little Christmas in July.  I wanted to share the Under the Mistletoe Designer Paper and the Stylish Christmas stamp set coordinated well with the designer paper.  I love Christmas plaids – red, green and black, they are so pretty and this one is my favorite in the package of papers.


Stylish Christmas stamp set, Under the Mistletoe Designer Paper
The poinsettia in the stamp set is one of the “distinctive” stamps — it shows the shading very well just by inking up the stamp.  I added the new Red Rhinestones to the center of the flower.  I used a Black Marker and drew the squiggle lines to help finish off the card.  I added a banner with Season’s Greetings.

Supplies Used:


Share this!

Masculine Happy Birthday with Best Route Designer Paper

I have a little more designer paper temptation for you today.  Have you looked at the Best Route designer paper shown on pages 52 & 53.  I just love this color combination, it is so bright and cheery and works great for masculine cards.  Today I paired the paper with the Lilypad Lake Stamp Set – the sail boats are wonderful.  I made it into a fun fold card – the boats layer is attached to an arm so the card opens once to the right and then the left flap opens (I love this fold).

Best Route Designer Paper, Lilypad Lake Stamp Set, Happy Birthday, Masculine
*Blueberry Bushel — 4 1/4″ x 9 3/4″ — score at 5 1/2″
*Gray Granite — 4″ x 5 1/4″
*Whisper White — 3 7/8″ x 5 1/8″
*Gray Granite — 4″ x 4″
*Best Route DSP — 3 7/8″ x 3 7/8″
*Gray Granite — 1 1/4″ x 4″ – score at 3/4″
*Bests Route DSP — 1 1/8″ x 3 7/8″
*Blueberry Bushel — 2 5/8″ x 2 5/8″
*Mango Melody — 2 3/8″ x 2 3/8″
*Whisper White — 2 pieces 2 3/4″ x 2 3/4″ — first piece — cut out with the Stitched Squares Framelit — stamp waves with Blueberry Bushel stamp pad.  I used the sun framelit with a sponger dauber and Daffodil Delight stamp pad to create the sun.  I used a sponger dauber with Balmy Blue stamp pad to create the sky.  Second piece – stamp boats with framelits — color with Stampin’ Blends — attach with Mini Dimensionals.
*Mango Melody — 1″ x 3″ — use framelit from Lakeside Framelits to cut banner — stamp Happy Birthday with Memento

COLOR COMBO:


Supplies Used:


Share this!