Masculine Note Card

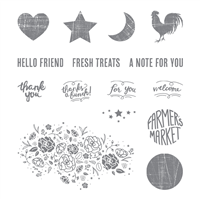
I was recently asked if I had any masculine cards on hand.  I dug through my card stash and only found a few.  Hmm….it’s time to make a few masculine cards to have on hand — not necessarily birthday just general cards that could be used for any occasion for those guys in our lives.  So here’s the first card I designed.  I used the stamp set Wood Words.  It’s has wonderful rustic images and a few short sweet phrases.  It was the perfect fit with the Wood Textures designer paper.  If you haven’t purchased that yet, you really need too — it is amazing.

Wood Words Stamp Set, Wood Textures Designer Paper, 1/4" Copper Trim

Measurements:
Very Vanilla – 4 1/4″ x 11″ — scored at 5 1/2″
Wood Texture designer paper – 2″ x 5 1/4″
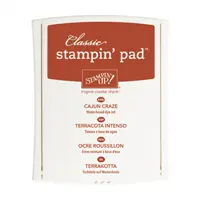
Cajun Craze – 1″ x 5 1/4″ — cut large scallop edge with Seasonal Layers Thinlit
Very Vanilla – 2 3/4″ x 5 1/4″
Cajun Craze – 3″ x 3″ — punch with 2 1/4″ circle punch
Wood Texture designer paper – punch with 2″ circle punch — stamp rooster with Cajun Craze ink — words with Early Espresso ink
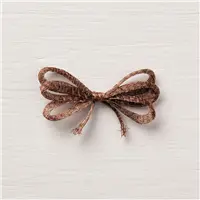
1/4″ Copper Trim – 8″ — loop on back of circles and attach with dimensionals

SUPPLIES:


Share this!

Happy Birthday to You

I love bright, cheery colors — here we have Tempting Turquoise and Lemon Lime Twist.  Aren’t they great!!  This card just makes me smile.  The Happy Birthday Thinlit and the Celebration Thinlits are the main focus here.  The background stamp is from Work of Art — isn’t that sweep off color fun.  Don’t forget the little “to you” in the lower corner — that wonderful script stamp comes from the Happy Birthday Gorgeous stamp.

Happy Birthday Thinlit, Celebration Thinlits, Work of Art Stamp Set, Birthday

Measurements & Tips:
Tempting Turquoise  5 1/2″ x 8 1/2″ — scored at 4 1/4″
Lemon Lime Twist – 4″ x 5 1/4″
Whisper White – 3 3/4″ x 5″ — stamp “swoosh” with Lemon Lime Twist — stamp “to you” with Tempting Turquoise
Tempting Turquoise – 3″ x 4″ — cut out Happy Birthday, hat and pompom — add Rhinestone to center of pompom

What a great card and it doesn’t require a ton of supplies — woohoo!!!

Color Palette:

SUPPLIES:

Share this!

It’s Summer Splash Time

Yesterday we held our Summer Splash Party!!!  It was a morning filled with fun stamping with a great group of ladies.  They were spread all around the school’s cafeteria (giving everyone enough room to stamp).  Everyone got to make 10 fun, assorted cards to mail covering a lot of their upcoming events .  It was a great morning spent with friends.

Summer Splash Stamping Event When they arrived we passed out these adorable little treat boxes with a surprise inside — chocolate of course.  These little boxes are so fun to make and pretty quick too.  I used the Pocketful of Sunshine Bundle (stamp set & framelit) with Bermuda Bay cardstock.  I added a little flower from the Flower Shop stamp set and punched it out with the coordinating Pansy punch. 

Pocketful of Sunshine Stamp Set, Pocket Framelit, Flower Shop, Pansy Punch, Rhinestones

DETAILS:
Bermuda Bay 
– 2 pieces 3 1/2″ x 3 1/2″ — stamp pocket & stitching lines on both pieces — add words to only one pocket.  Cut out with coordinating Pocket Framelit.  Put Tear & Tape on all pocket flaps
Bermuda Bay – 1″ x 7 3/4″ — score at 2 1/4″, 3 3/4″ & 5 1/4″.  Attach to one pocket — when completed, attach second pocket.  Punch holes with 1/8″ handheld punch
Whisper White 1/8″ Sheer Ribbon – 8″ – poke each end to the inside of the pocket box to make a handle
Bermuda Bay – 2 pieces 7/8″ x 7/8″ – attach to inside of pocket box over the ribbon (just finishes off inside and holds ribbon in place)
Whisper White — 2 1/2″ x 3 1/2″ — stamp Flower Shop flower with Bermuda Bay ink — Punch out with Pansy Punch.  Put Rhinestone in the center and attach the flower to the box with a dimensional.
VIOLA — you are done!!!  Put some “crinkle” paper inside and add a little treat.

SUPPLIES:


Share this!