Stampin’ Sisters Project 5 — Nailed It

We made it through half of our Stampin’ Sisters Retreat Projects.
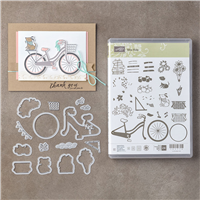
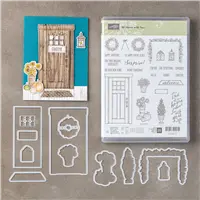
Now we are on to Project 5 which featured the Nailed It Bundle.
We made four great cards and even added some of the Urban Underground Embellishments to a couple of the cards — these are so adorable.
NailedItCards
I love all the tools on the first card.
NailedItCard1
I love all the texture on this second card.
NailedItCard2
Don’t you love the little screws at the bottom — they are from the Urban Underground Embellishments.  They look so real — love it.

The next card reminds me of my dad and brother — my dad is always building something and my brother is a carpenter — he builds houses.
NailedItCard3
The star on the pocket is another embellishment — it fits just perfect.

The last card is MY card — I love the girly tools and yes I do have some of my own tools.
NailedItCard4
We added a couple bolt heads from the Urban Underground Embellishments.
I think they are just the right touch.

I hope you’ll give this bundle a try — all those little tools are so much fun.

SUPPLIES:

Share this!

Stampin’ Sisters Project 4 — Mini Album

Sorry, no post yesterday — I took Friday night off and had a fabulous evening with my hubby — dinner out and just plain relaxing.  I feel much better!!!!
So back to Stampin’ Sisters Retreat Projects.
Today we have project 4 which is a Mini Album (scrapbook, photo book).
This little book is 4″ x 5″ when folded up so it is perfect to tuck into your purse to share fun family photos.
Mini Album
Open it up to expose the first layer of photo mats.
Mini Album 1
Then fold those flaps down and see the pretty inside — you have plenty of space for those pictures.
Mini Album 2
It’s very quick to make:
1.  Start with a piece of 12″ x 12″ cardstock (I used the Falling in Love pack)
2.  Score one side at 3 3/4″, 4″, 7 7/8″, 8 1/8″
3. Turn 90 degrees and score the other side at 4 3/4″, 9 5/8″
4.  On the end with the 4 3/4″ panels cut on both score lines up to the next score line
(see picture)
5.  Top Flaps — cut on score line same as bottom panel
a.  Then cut 1/4″ off left flap
b. Trim center flap at angle as shown
6.  Cut 9 mats at 3 1/2″ x 4 5/8″
7. Cut 6 designer paper mats at 3 3/8″ x 4 1/2″
8.  Decorate as you wish — we used Hey Chick stamp set.

Have a Happy Sunday!!

Supplies:

Share this!

Stampin’ Sisters – Project 3 Fun Fold Cards

The Stampin’ Sisters Retreat third project was Fun Fold Cards.
This project was a hit with many of the ladies.
FunFoldCards
We highlighted some of the Occasions and Sale-a-Bration designer papers.
FunFoldCard1
This card is fun — it keeps unfolding and changing looks each time.
FunFoldCard1-2
The flap lifts up to reveal a plain layer.
Pull the Real Red layer down and you get this:
FunFoldCard1-3
We are highlighting the Urban Underground — love this paper.
Now open the doors…..
FunFoldCard1-4
And you have the Beautiful You lady dancing and singing her heart out.

Card 2 was a “fan” favorite.
FunFoldCard2
A sweet, simple triple layer card — very unassuming.
Just pull the card open to reveal all three layers.
FunFoldCard2-2
It’s filled with pretty flowers and a beautiful dragonfly.

Card 3 has a great twist fold.
FunFoldCard3
Isn’t this fun!!!
Pull the corners open to reveal your greeting.
FunFoldCard3-1
Enough room to write a little note too.

This was a great set of cards and I think everyone was very pleased when they finished.

Card Supplies:

Share this!