Shooting Star

My inspiration for this card came from fellow demonstrator Brian King.
I loved this color combination and added a bit of my own.

The Shooting Star stamp set and Sliding Star framelit make this card easy to assemble.

Shooting Star
Card base — Pumpkin Pie
Basic Grey layer
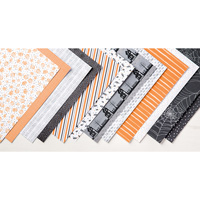
Whisper White — add strip of Neutral Background designer paper and strip of Basic Gray cardstock.

I stamped You Are Amazing from Cottage Greeting stamp set.
Cut "smiley" using the Sliding Star framelit.

Stamp star on Whisper White cardstock with Stazon ink
Cut out with framelit — Color with markers.

Stack two dimensionals (with points cut off) between two pennies.
Glue star on to penny and slip into "smiley" face.

Tilt card and watch the shooting star — so fun.

Share this!

Spinning Bee

Last night was my Stamp of the Month Class.
This month we focused on the Shooting Star Bundle.
Everyone received the Shooting Star stamp set and
the Sliding Star Framelits and we made four cards.
I wanted to show them how you can use the products as
shown in the catalog or mix them up and use portions of the
items and mix with other products.

Here is the first card we made.
I just love this little bee and I especially love
how he spins around the card “playing” with the other baby bees.

Bee Hive
I started with Dapper Denim card base.
Add a layer of Delightful Dijon — love this color combo.
Whisper White square — cut out the circles using the
Sliding Star framelit.
Stamp a few little bees and color with markers
On Whisper White scraps stamp the larger bee and the honeycomb
with Stazon ink and color with markers.

Put Foam Adhesive Strips around the circle, don’t get to close to the edge.
Also put foam adhesive strips on the large circle again don’t get to close to the inside circle.
Attach to card.
Use two pennies for the spinner — I put the pennies together with two dimensionals stacked on top of each other — snips off the points to kind of round the dimensionals.
Glue bee to the penny and insert in opening.

Spin the bee around the circles.

Share this!

Teacher Gift

Has school started for all your kids yet?
Some started back last week, some don't start for a couple weeks yet.
The school I work at started today.
Soon all kids will be back at school and wouldn't you love to
send the PERFECT gift for the teacher.

I have the answer for you — actually I have another guest stamper today
who has the answer for you.
My daughter, Katie Campbell is one of my Team Members.
Katie is a teacher so she knows what teachers like to receive.
She made these adorable items for sons' teachers.
I thought this was such a great idea that I just had to share it with you today,
our first day of school!!!
Katie's Pencil Jar
Isn't this adorable to sit on a teacher's desk??
But check this out.
Katie's Pencil Jar Up
Don't you just love it.

Katie used straw holders she found at the store.
Put designer paper inside the jar.
Wrapped a decorative band around the center.


Then she went to her computer.
She typed the teachers' names and PENCILS in a fun font.
Printed it on Whisper White cardstock
Attached it to a layer of coordinating cardstock
Attached it to front of jar
Filled jar with pencils.

Work in an office — fill it with pens.
I just love this idea and you could use any designer paper.

Share this!