Thank You So Very Much

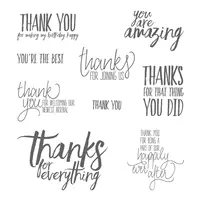
As we come to the final days of Sale-a-Bration I want to share some of the great items that are still available for you to choose.  Today’s card actually features two items — So Very Much stamp set and the Succulent Gardens designer paper.  My sister, Tina, designed this card for an event she held this past week and I love the simplicity and highlighting both of these items so I made one little change and we stamped this card at my Team Meeting Thursday night.
Succulent Thank You
Tips:
1. Card base is Mint Macaron
2. Layer of Smoky Slate
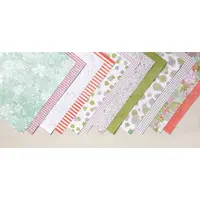
3. Layer of Succulent Garden designer paper — you can purchase this designer paper for $11 or choose it as your Sale-a-Bration choice FREE
4. Stamp “Thank You” and “so very much” with Smoky Slate ink — the So Very Much stamp set is also a Sale-a-Bration item you can choose FREE
5.  Attach a piece of the Mint Macaron Sheer Linen Ribbon to back of designer paper
6.  Tie a bow with ribbon and attach with a Glue Dot

I love how simple but beautiful this card is.

SUPPLIES:

Share this!

Masculine Crazy Cakes

Do you struggle making Masculine cards?  I have a great solution for you.
I actually saw this card on my sister, Tina’s blog and I fell in love with it. 
It uses the Cake Crazy stamp set and is so much fun to make.
I adjusted the layer sizes a bit but the rest of the card was perfect.
We did this at my Team Meeting the other night.
I really love two step stamping with the photopolymer stamp sets.

Crazy CakesHere’s how the card was made:
1. Stamp the “Tiny Dots, Row of Dots & Line” image using Basic Black ink
2.  Stamp the “Wavy Line & Argyle” image on top using Soft Suede ink (love how you can see through the stamp and it matches up so well)
3.  Stamp the “just argyle” image on top using Crumb Cake ink (look how it lines up)
4. Stamp the “up & down lines with top and bottom lines” using Soft Suede ink
5.  Stamp the “up & down only lines” on top using Crumb Cake ink — they fit right between the Soft Suede lines

6.  Stamp “Bow Tie” using Memento ink
7.  Stamp the single candle using Crumb Cake ink
8.  Stamp the flame using Soft Suede ink
9.  Add a Pearl to the Bow Tie

I was a little intimidated by this card but it was so much fun to make.
I can’t wait to try it with fun, bright girl colors too.

Share this!

Easter Message

Can you believe there is only one week left in March?
That means Easter is rolling up on us quickly.
It’s time to get some Easter cards made and ready to send out.
I love playing with the fun, cute Easter stamp sets
but like Christmas the real reason for Easter is Jesus Christ.
Today I have a religious Easter card for you is
quite simple but very moving.
Easter Message
Tips:
Card base is Sahara Sand — 5 1/2″ x 6 1/4″ — score at 2″
Copper Foil Sheet — 1 7/8″ x 5 3/8″
Falling in Love designer paper — 1 3/4″ x 5 1/4″

Stamp greeting with Versamark — heat emboss with Copper embossing powder
Stamp cross with VersaMark on Very Vanilla — heat emboss with Copper embossing powder
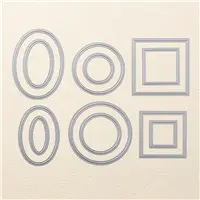
Cut out with Layering Ovals Framelits
Cut out scallop oval from Copper Foil Sheet
Color in cross with Soft Suede Marker
Add Clear Wink of Stella to the draped cloth

This card made me stop for remember why we celebrate Easter.
I hope you will give it a try.

Share this!