High Tide Coasters

I love making gift items — do you?
At my High Tide Class we stamped on cork coasters.
It was so much fun — the ladies were all thrilled with
their finished project and were ready to go home
and stamp a bunch more for gifts.
Coasters
Aren’t they awesome — very simple to make though.

I found cork coasters at a kitchen store in a mall — Kitchen Collections.
I did a little Amazon search and found these which I believe are similar.
Amazon Cork Coasters

Tips:
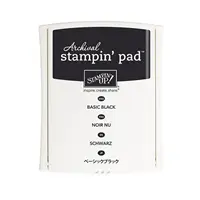
I used Archival Basic Grey ink — you could also use Archival Black.
Don’t use Stazon with the Photopolymer stamps!

I stamped the lighthouse and then added the sand and a few patches of grass.
You could also add some sea gulls if you wanted to.

I did spray the coasters with an Acrylic Sealer to help seal the ink.
These coasters are not completely water proof — the sealer helps
but you do want to avoid a lot of water dripping on them.

Give it a try — you will be amazed at how easy they are to make.

Share this!

High Tide Fun!!!

Last night was my Stamp of the Month Class.
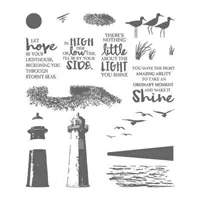
This month we used the High Tide stamp set.
This is a MUST have stamp set — oh my gosh is was so much
fun to work with.  I felt like an artist — though I had lots of
Pinterest inspiration when designing the projects.

Check out the fun these ladies are having — a bit of concentration
and direction giving going on.
Stampers
Stampers 2
They're working so hard on the third project of the night.
We did two cards and two 3-D items.
Here is the first card — I let them get warmed up a bit.
High Tide Hope
Kind of soft and mellow and very heart felt.

Card Tips:
1.  Lighthouse — I started by stamping the fuller image of the lighthouse (3 section piece) with Night of Navy ink
2.  I stamped the second light house image over the first — inked with Night of Navy and stamped off then stamped on the card
3.  Stamp sand with Crumb Cake — I love how this stamp fits around the lighthouse base
4. Stamp birds with Smoky Slate
5.  Stamp words with Night of Navy

Everyone loved this simply but meaningful card — then we started moving up to harder projects.  Come back tomorrow to see what we made next.

SUPPLIES:

Oh my goodness, I almost forgot to mention — there are only 9 days left of Sale-a-Bration AND Stampin' Up! just added 7 NEW items for you to choose from.  I love surprises. 
Do you love designer papers — you have some great choices to choose FREE with a $50 order.
Check out these new items — I love it!!!
NEW SALE-A-BRATION ITEMS

Share this!

Spring Flower for Easter

Yesterday was the first day of Spring so I thought this card would be perfect to share.
The Timeless Tags Thinlits Dies are the featured product and to me this is a must have item.
I also used the coordinating That's the Tag stamp set — purchase both items together in a bundle and save 10% — I love a sale, don't you.
Timeless Tags Easter
Card Tips:
I started with my favorite spring color — Sweet Sugarplum (I know, I never thought I would say this was a favorite color but I am loving it for spring).
I added Whisper White and Basic Black accent colors.
1.  Emboss Sweet Sugarplum layer with Elegant Dots embossing folder
2.  Cut out flower tag from Black cardstock
3.  Cut out two Whisper White plain oval tags — I adhered these together with the hole at opposite ends so the hole didn't show as much
4.  Adhere the black tag to the white tags — I sponged Multipurpose Glue ("green" glue) on the back of the black tag to adhere to the white tags
5.  Color flower as pictured with markers — Pear Pizzazz and Sweet Sugarplum
I added a little Clear Wink of Stella to the flower center
6.  I stamped the label from That's the Tag stamp set with Memento ink and added
Happy Easter (Teeny Tiny Wishes) with Pear Pizzazz ink
I colored the little flowers with the markers

Such a stunning card without a lot of work.

SUPPLIES:

Share this!