Sale-a-Bration is Over — now use the FREE stuff you earned

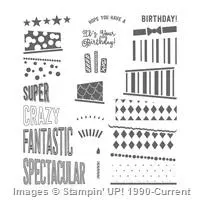
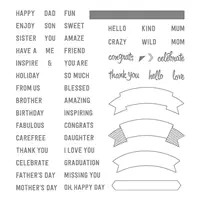
That's right Sale-a-Bration is over!!  You earned fun new products FREE — now get those new goodies out and start stamping.  I wanted to share this fun card we made using Avant Garden stamp set and the Inside the Lines designer paper — so much fun.
Inside Lines
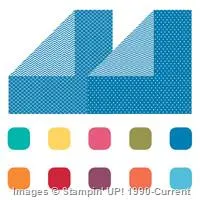
The Inside the Lines designer paper is so much fun.  It works great like this — just the design of the paper — but if you want more color get out your markers or watercolor pencils and color away.

Card Tips:
* Card base — Thick Whisper White — 5 1/2" x 8 1/2"
* Black — 4" x 5 1/4"
* Whisper White — 3 3/4" x 5" — emboss with Petal Burst embossing folder
* Inside the Lines designer paper — 2" x 5"
* Black — 1/2" x 5"
* Black — Layering Squares Framelits
* Whisper White — 2" x 2" — stamp flower with Blushing Bride ink
stamp greeting with Memento ink

This card could be made with any of our fabulous designer papers and stamp sets.
Stamp away and share your card with me.

Card Supplies:

Share this!

Basket Bunch Easter Framed Art

With Easter just over 2 weeks away it was time to make a framed art piece.
My customers love making these and this one was a blast.  I wasn’t feeling well as I was trying to design this and BJ Peters came to the rescue.  She used the Basket Bunch Bundle to make a fabulous framed art piece — I took her layout, changed colors and some bigger layers and turned my Easter framed art piece into a 12″ x 12″.  The ladies LOVED it and I had so much fun I forgot I was sick.  I put my piece into a 12″ x 12″ White Shadow Box frame — too much glare from the glass to take a good picture of it in the frame.
Easter Framed Art
I started with a piece of the Succulent Garden designer paper — today is the last day to choose this paper as a FREE Sale-a-Bration item.  After tomorrow the paper will cost $11.00.
I added squares of Early Espresso and Calypso Coral cardstock — one on a diagonal and another squared.
Then I prepared all the panels.
Easter Framed Art Stamped Panel
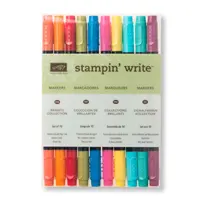
I stamped all the images on Whisper White cardstock and colored them with markers:
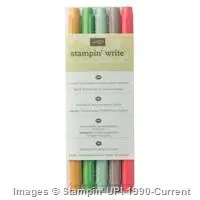
So Saffron, Crushed Curry, Blushing Bride, Tangerine Tango, Calypso Coral, Pear Pizzazz, Old Olive, Bermuda Bay
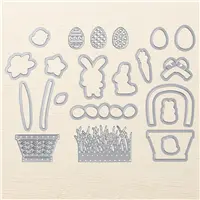
Once they were all colored I cut them out with the coordinating framelits.
Easter Framed Art Stamped Panel 2
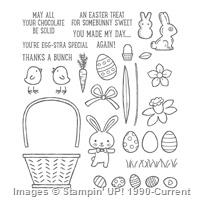
Then I stamped the “chocolate” bunnies on Tip Top Taupe with Early Espresso ink.
I also stamped a tiny basket with Memento ink — the bunnies are cut out with a framelit, the basket is fussy cut using your paper snips.
I stamped the adorable bunny peep with Memento on Calypso Coral and cut out with the framelit.
Stamp three chicks — two one direction and one the other directions — yes there are two different chick stamps and the framelits too match — cut those out
Easter Framed Art Cutting Grass
Cut out two grass sections from Pear Pizzazz
Easter Framed Art Cutting Basket
Cut out the basket pieces as shown from Early Espresso.  I attached the handle with Glue Dots and the two basket pieces with dimensionals.
Easter Framed Art Stamped Panel 3
On two 2″ x 2″ Whisper White squares stamp grass and flower stems & leaves with Pear Pizzazz ink — I colored in the leaves in the Pear Pizzazz marker.
I cut a 2″ x 2″ square of Succulent Garden designer paper — Tip Top Taupe gingham and stamp the chick feet at the bottom (yes, there are two feet stamps — one for each direction).
I also stamped “May all your chocolate be solid” with Memento ink — really, should chocolate be anything but solid????

Ok, now it’s time to assemble your artwork.
Easter Framed Art Panel 1
Dimensionals under “Happy Easter” oval and single bunny
Easter Framed Art Panel 2
Dimensionals under chicks and flowers
Easter Framed Art Panel 3
Dimensionals under bunnies, basket and eggs
Easter Framed Art Panel 3a
Dimensionals under carrots

As I assembled the big squares — I used dimensionals under the first Early Espresso/Calypso Coral square — the rest is attached with Fast Fuse.

This was so much fun to make — you still have 2 weeks to get yours done.
Remember today is the last day of Sale-a-Bration — please your order now and you can choose the Succulent Garden designer paper and have your background piece all set.

Here are the supplies you need — just click the picture to order each item.

Share this!

Make a Medallion Anniversary

One of my friends at work asked if I could make her an anniversary card — sure, I like to make cards, right.  As my theme has been lately, my sister, Tina came to my rescue.  I love a card she made using the Sale-a-Bration stamp set, Make a Medallion.  She combined this fun image with the Floral Boutique designer paper — oh so fun.
Here is my version using both of these products.
Make a Medallion
I love this card fold.
*Night of Navy cardstock is 4 1/4″ x 8 1/2″ — score at 5 1/2″
*I added a 4″ x 5 1/4″ Whisper White for the inside which also shows on the right side of the card.
*Floral Boutique designer paper — 2 3/4″ x 4″
*Night of Navy — 3″ x 4″
*Whisper White — 2 3/4″ x 3 3/4″ — stamp medallion with Night of Navy ink
*Stamp Happy Anniversary from So In Love stamp set with Night of Navy ink on Whisper White scrap — cut out with framelit from Bunch of Banners
*Attach banner to Night of Navy (5/8″ x 3″) trim banner ends
*Attach banners over medallion with dimensionals
*Attach medallion/night of navy layers to card front with dimensionals (put dimensionals only on left side and center — don’t put on right side or you’ll see your card shut)
Make a Medallion Close Up

Tina had to point out the monkey face in the medallion scallops — do you see it?
Now that’s all I see when I look at it.  Sorry — now you’ll see it every time too.

Remember, tomorrow is the last day of Sale-a-Bration.
These items will not be in the next catalog — Sale-a-Bration items will be gone, so get them now!!!

CARD SUPPLIES:

Share this!