Twelve Days of Christmas Giveaways

Christmas is approaching very quickly.
Only 12 days until Christmas Day.
I'm going to celebrate with all of you.
I am holding a Twelve Days of Christmas Giveaway.
Each day beginning today, December 13th
you have a chance to win a prize,
but you have to leave a comment to get your
name in the drawing.  Who's ready to play????

What is your favorite holiday tradition?
Post a comment — you could be the winner.

I promised I would post directions for the
Chapstick Box I posted last week.

Here you go:
Chapstick Box logo
I used Emerald Envy cardstock and
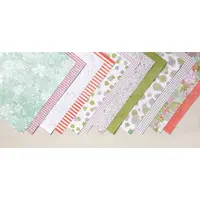
Presents & Pinecones designer paper
Box
Cardstock — 4 3/4" x 7"
Score 1" & 3 3/4" down long side
Score 1/2", 1 1/2", 2 1/2" & 3 1/2"
Score at 4 1/2" only to the 1" score lines as shown
Box 1
Cut off 2 1/2" each section on both sides
Snip tabs up to 1" score line — I like to cut the
small tabs at a little angle to lose some bulk
Trim the 1/2" piece at angle — this gets tucked
into the top to close box
Box 2
Using the Lots of Labels Framelits
trim the top edge of the box as shown
Box 3

Box 4
Cut the designer paper with the next
smaller label framelit and attach to box
Box 5
Top designer piece — 7/8" x 2 7/8"
Attach to box top and use Paper Piercing Tool
to poke a hole.  I used Red Baker's Twine
threaded through a Red Mini Jingle Bell
and then threaded through the hole
and tie several times on the inside.
Trim the top 1" tabs to about 1/2" and
cut at angles.
Box 6
Assemble box with Fast Fuse or
Tear & Tape (snail will not hold this box).
Box 7
Continue assembling the box.
DON'T put adhesive on the 1/2" flaps.
These tuck into the box to close the
chapstick inside.
Box 8
Designer Paper — 7/8" x 7/8" — 2 pieces
attach over these end flaps
Put chapstick in box and close.
You are ready for gifting this pretty present.

div style="margin:10px 0;background-color:#fff">

Share this!

Kristen’s Christmas Card

I have a newer customer who
sent me an email last week.
She told me that she had been
working on Christmas cards since
September.  She looked at samples
on Pinterest but didn't find what she wanted.
She likes to incorporate a picture of her
twin son & daughter with her cards.
When she couldn't find a design someone
else had done she designed her own card.

I have to say I am SO PROUD of her.
Her card is fabulous — I asked Kristen
if I could share her card with you.

Kristen's Card Front
The twins are so adorable in their
Santa outfits.
I love the simplicity of this card.
That's not to say there wasn't a lot
of work done to make this — plenty
of embossing and die cutting.

And since she didn't have any stamping on
the front of the card, she added it to the inside.
Check this out.
Kristen's Card Inside
Didn't she do a fabulous job!!!
I can't wait until she gets her hands on the
new Watercolor Pencils coming out in
the Occasions Catalog (oops, sneak peek).

GREAT JOB KRISTEN!!!
Thanks for letting me share you talent.

I would love to have you share your Christmas card with me.

Share this!

Desktop Calendar with Note Paper

Today’s project is perfect for co-workers.
A pretty little box for their desk to hold
note paper and a calendar for quick reference.
I know we all have Google calendars and
planner books to keep us organized but
sometimes it’s nice to have a calendar
right in front of you for a quick glance.

Note Paper Calendar logo
I used different designer papers — one for
the women and one with a bit more masculine
look for the men you work with.

They are pretty quick to put together,
no stamping just cardstock and designer paper.


Directions:
1. Cardstock — 4 1/4″ x 10″
score at 1/2″, 2″ 3 1/2″, 9 1/2
put Tear & Tape on the two 1/2″ ends
fold on all score lines
2. Cardstock — 4 1/4″ x 6″
3.  Cardstock — 6 1/4″ x 7″
score 1″ down both sides
score 3″ & 4″
snip tabs as shown in picture
attach Tear & Tape
4.  Cardstock — 2 1/2″ x 3 1/4″
Calendar gets attached to this
5.  DSP — 2 pieces 2 7/8″ x 4 1/8″
6.  DSP — 2 pieces 7/8″ x 2 7/8″
7.  Ribbon — 12″
All Pieces

DSP
Attach designer papers and calendar
Mountain & Valley
4 1/4″ x 10″ piece — fold as shown
Attach the 4 1/4″ x 6″ cardstock to the 1/2″ Tear & Tape end without the extra folds
Attaching Front
Now fold up on scores and attach the other end
Attaching Front 2
Time to create the box
Box Tabs
Attach the little tabs over the side without Tear & Tape
Fold the side with Tear & Tape over to create a little box
Box with Tear & Tape
Attach little designer paper pieces to the sides
Put Tear & Tape on back of box
Attaching Box
Attach box to folder base (below the designer paper)
Box on
Wrap ribbon around the box
I overlapped mine on the front as the calendar will cover it
Attach the calendar
Completed Holder

Once you have the pieces cut they are very fast to assemble.
You can use lots of different designer papers.
It’s a great way to use up scraps.


Share this!