Yay Presents!!

My birthday week is over.
I thought over the next few days
I would share a few of the fabulous cards
that I received.  I really do love receiving
hand made cards.  I know that someone
cared enough about me to take time out of their
busy lives just for me — that is such a special feeling.
Katie's CardThis has been a week to share my daughter’s talents.
Katie sent this wonderful card to me.
She tells everyone that she gets nervous when she
makes a card for me — I think she did a GREAT job
on this card.

The base is Smoky Slate with layers of Black,
Whisper White and It’s My Party designer paper.
She added a strip of Black cardstock with another
print from the It’s My Party designer paper stack.
Don’t you love the banners of designer paper
draped over the Baker’s Twine.

She stamped the cupcakes from
Party Wishes stamp set in
Mint Macaron, Melon Mambo & Crushed Curry inks.
Then she punched them out with the coordinating
Party Punch Pack cupcake punch.
She used the 2-way Glue Pen and
Dazzling Diamonds to the frosting
for some extra sparkle.

Yay Presents! was stamped with Memento ink
and colored in with Mint Macaron, Melon Mambo
and Crushed Curry markers.
She even add some It’s My Party Enamel Dots.

Such a bright, fun card.
Thank you Katie (Scott and the boys too).
I love this card.

Share this!

Watermelon Thanks

This was my favorite card at my Stamp & Go Classes
this week.  Everyone commented they loved the color combo.
We used the Timeless Textures stamp set.
I think this card might be right up my friend Rorie’s alley.
Watermelon ThanksWe started with Basic Grey card base.
Then added my layers — Watermelon Wonder, Basic Grey
and Whisper White. 
On the Whisper White layer we used Smoky Slate ink with
the Timeless Textures images. 

First we used this image
Stamp 1
We inked the stamp and “tap stamped” around all four edges
reinking periodically.
Stamp 2
This gave us a border around the cardstock.

Then we went on to the next stamp.  We inked it, stamped off
and then stamped it one and repeat this a second time.
Stamp 3
We are just filling white space, so on to the next stamp.
Stamp 4
We inked the stamp, stamped off, stamp — repeat several times.

Then we added a few dots.
Stamp 5
Now that we filled the white space we added just a bit of color.
Stamp 6
I love this filigree stamp — Watermelon Wonder ink
added the final touch.

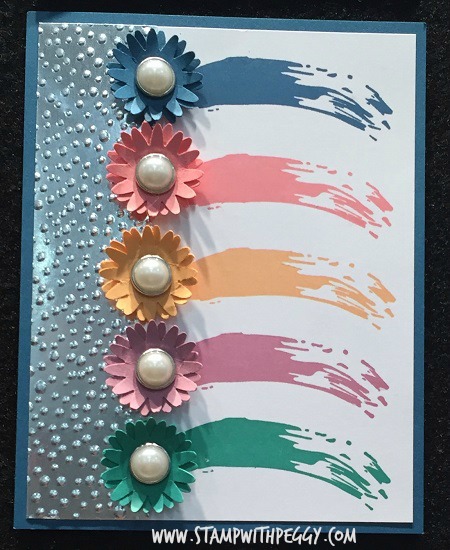
Then we assembled the card added some Silver Metallic Thread
and some flowers cut with the Botanical Builders Thinlits
and Watermelon Wonder and Smoky Slate cardstocks.
Don’t forget to add pearls to the flower centers.

I LOVE THIS CARD — how about you?

Share this!

Daisy Thanks

Did you know that I will send you a Thank You Card with a
special Customer Loyalty Token for every $50 order you 
place with me online or in person. 
So I am in need of a bunch of Thank You Cards.
I had Stamp & Go Club this week so guess what we
made?  That’s right, Thank You Cards was the
theme this month.
Daisy ThanksThis card started with Rich Razzleberry base.
Next was a layer of Pear Pizzazz and then Whisper White for
stamping.  I used the Helping Me Grow stamp set
(that’s my April Stamp of the Month Class).
We stamped the daisies with Memento ink in the center.
Then we added the little corner flowers to all four corners.

Then we had a scrap of Whisper White cardstock to
stamp the frame and THANKS with Memento ink.
We used the Rose Garden Thinlits to cut the frame out.
(did you know these thinlits are on sale until Monday)

Then we used Clear Wink of Stella (love this) to
color in the white parts of the daisies and
we used the Gold Wink of Stella for the centers
of the flowers and the four little flowers in the
corners.  We also added the Gold Wink of Stella
around the frame (love it).

Assemble the card — don’t forget those dimensionals
under the frame — you know I had to add
dimensionals somewhere.

This is a great card to mass produce.
Tell everyone THANKS for being my friend.
Wouldn’t you love to get a card like that,
no special occasion just THANKS for liking me!!!

Share this!